表格基礎介紹
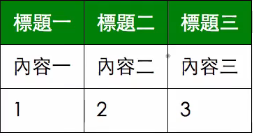
HTML 表格(tables)用於在網頁中呈現表格。表格是由
元素開始和結束,並包含許多子元素來定義表格的各個部分。下面是一些基本元素及其用途:
1. <table>:定義表格的開始和結束。 2. <tr>(Table Row):定義表格中的一行。 3.<th>(Table Header):定義表格中的表頭單元格,通常是表格的標題。 4. <td>(Table Data):定義表格中的數據單元格。
1
2
3
4
5
6
7
8
9
10
11
12
| <table class="table">
<tr>
<th>姓名</th>
<th>年齡</th>
<th>職業</th>
</tr>
<tr>
<td>王小名</td>
<td>15</td>
<td>學生</td>
</tr>
</table>
|
設定表格樣式
因為在表格設定 border 時,預設會有格與格的間距,如下圖

在 css reset 上會將表格與表格空隙清除
1
2
3
4
5
| // css reset
table {
border-collapse: collapse;
border-spacing: 0;
}
|
清除空隙後可以設定 border 樣式
1
2
3
4
5
6
7
8
9
10
11
12
13
14
15
16
| .table th,
.table td {
border: 1px solid #000;
}
// th 欄位用padding推出空間
.table th {
padding: 10px;
background-color: green;
color: white;
}
// td 欄位用padding推出空間
.table td {
padding: 10px;
}
|

表單元素介紹
HTML 表單是用來收集使用者輸入資料的工具,廣泛應用於各種網站和網頁應用程式中。表單由一組 HTML 元素組成,每個元素都具有特定的功能,如文本輸入框、單選按鈕、複選框和下拉選單等。
1
2
3
4
5
| <form action="index.html" method="get">
<input type="text" name="mail" />
<input type="text" name="person" />
<input type="submit" id="name" value="確認送出" />
</form>
|
表單內容會放在 form 元素內,在 input 欄位內輸入的資料,在按下 submit 按鈕後,會依照 name 的值,將資料傳送出去,網址會像這樣:
1
| index.html?mail=abc@mail.com&person=小明
|
上面 mail 和 person 欄位分別帶入輸入的值。
label、placeholder

1
| <input type="text" name="person" placehoder="請輸入文字欄位" />
|
在 input 上加入 placehoder,可以添加提示文字,讓使用者知道要輸入什麼資料,建議 input 都要搭配 label,用 for 和 id 互相對應。
1
2
| <label for="mail">電子郵件:</label>
<input id="mail" type="text" placeholder="請輸入電子郵件" name="mail" />
|
在 label 元素加上與 input 元素對應的 id,當使用者點擊 label 時, input 輸入框就會自動被選取,增加使用者體驗。
- type=”date”: 會跳出日曆選擇器,但在每個瀏覽器會不太相同,建議使用 datepicker 的套件代替。
- type=”text”: 純文字欄位
- type=”email”: 輸入 email 欄位
- type=”range”: 會出現範圍拉條
- type=”number”: 只能輸入數字,不能輸入字母
- type=”tel”: 手機版會跳出電話鍵盤
其他 type 可以參考 MDN
- readonly: 僅能讀取,不能寫入
- disabled: 禁用
- required: 必填欄位,可做簡易驗證。
radio、checkbox
1
2
3
4
5
6
7
| <form action="index.html">
<h2>性別</h2>
<input type="radio" name="sex" value="male" id="male" />
<label for="male">男生</label>
<input type="radio" name="sex" value="female" />
<label for="female">男生</label>
</form>
|
在表單中,radio 是作為單選題使用,使用相同的 name 來將選項群組。

1
2
3
4
5
6
7
8
9
| <form action="index.html">
<h2>興趣</h2>
<input type="checkbox" name="hobby" value="movie" id="movie" />
<label for="movie">看電影</label>
<input type="checkbox" name="hobby" value="music" id="music" />
<label for="music">聽音樂</label>
<input type="checkbox" name="hobby" value="paint" id="paint" />
<label for="paint">畫畫</label>
</form>
|
在表單中,checkbox 是作為多選題使用,使用相同的 name 來將選項群組。

select、textarea
1
2
3
4
5
6
7
8
| <form action="index.html">
<label for="birth">生日:</label>
<select name="birth" id="birth">
<option value="1900">1900</option>
<option value="1901">1901</option>
</select>
<input type="submit" id="name" value="確認送出" />
</form>
|

select 會搭配 option 元素使用,option 是下拉選單的選項,value 則是表單送出會帶入的值。
1
| <textarea name="content" id="" cols="60" rows="10"></textarea>
|
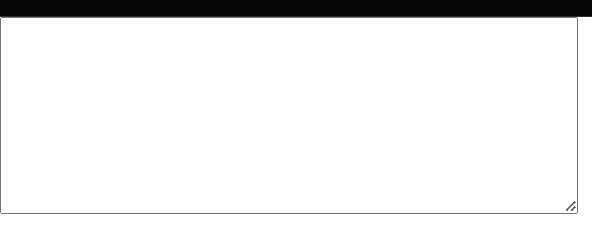
textarea 用來輸入多行文字的表單元素,cols 代表一行可以輸入幾個文字,rows 代表能輸入多少列。

CSS 自訂表單樣式
我們可以使用 CSS 自訂表單樣式
1
| <input type="text" class="text-input" />
|
1
2
3
4
5
6
7
8
9
10
11
12
13
14
| .text-input {
border: 3px solid pink;
border-radius: 10px;
color: red;
background-color: #eee;
padding: 5px 10px;
font-size: 1.5rem;
apperance: none;
}
// 表單和按鈕最好做一樣大,因為常會放在一起。
.btn {
padding: 5px 10px;
}
|
上面設定後就可以產生下面樣式的 input

設定樣式時,也要記得加上:focus, active
1
2
3
4
5
6
7
8
9
10
11
12
13
14
15
| .text-input:focus {
background-color: #eee;
outline: none;
}
// 按鈕可以加上 hover,被滑入時樣式
.btn:hover {
background-color: red;
}
// 按鈕可以加上 active,被點擊時樣式
.btn:active,
.btn.active {
background-color: red;
}
|


