NextJs (8) Link 元件
使用 link 元件
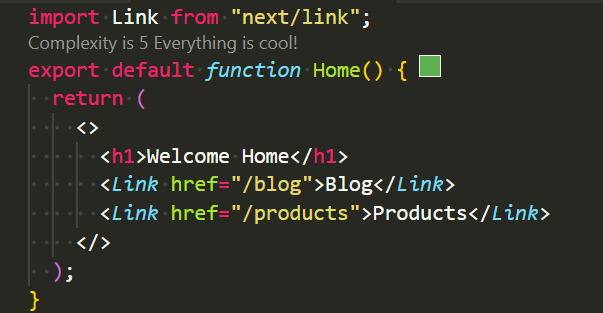
在 nextJs 裡,可以 import Link 元件,作為換頁的連結

可選屬性(部分):
- replace:使用 replaceState 而非 pushState
- scroll:默認會滾動到頁首,設 false 可保留當前滾動位置
- prefetch:可關閉預取
- onNavigate:事件回調
- legacyBehavior、passHref(針對自訂子元件
在 Next.js 中都應該用 link 元件而非 a 連結,因為有預取功能。
預取(Prefetching):當使用 並且該連結出現在畫面視窗或被 hover 時,Next.js 會提前載入對應路由所需資料,以提升點擊後的響應速度
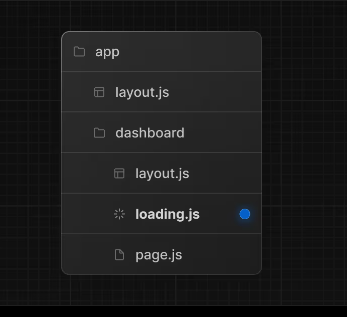
動態路由:對於像 /blog/[slug] 的動態路由,預設不會完整預取。如果有 loading.js,會只預取 shared layout 與 loading skeleton,以支援部分預取與串流加速。

動態路徑
Link 元件的 href 也可以帶入變數
1 | <Link href={`products/${productId}`}>Product {productId}</Link> |
replace
replace 是一個可選屬性,當你設定 replace 屬性時,Next.js 會使用 replaceState 而不是 pushState 來更新歷史紀錄。
如果你想讓使用者點擊鏈接後,不將新的頁面加入到歷史紀錄中,可以使用 replace 屬性:
1 | import Link from "next/link"; |
replace 屬性通常在下列情況下會比較實用:
- 當你不希望使用者按下返回鍵時回到上一個頁面,特別是在有多步驟的表單或流程時。
- 當頁面狀態變化對使用者而言是透明的,不需要新增一個歷史紀錄。
usePathname
在 Next.js 中,usePathname 是一個內建的 React hook,用來獲取當前頁面的 URL 路徑名稱(pathname)。它是 Next.js App Router 的一部分,方便你在應用中獲取當前的路徑,並基於此進行一些邏輯操作,比如在某些頁面顯示特定內容。
- 基本用法
要使用 usePathname,你首先需要從 next/navigation 匯入它,然後在元件內調用即可。
1 | import { usePathname } from "next/navigation"; |
usePathname() 會返回一個字串,這個字串是當前頁面的路徑。例如:
- 如果當前頁面是 /about,則 pathname 會是 “/about”。
- 如果是 /posts/123,pathname 則會是 “/posts/123”。
實際應用場景
- 高亮當前導航項目:
你可以使用 usePathname 來根據當前的路徑來高亮對應的導航連結:
1 | import { usePathname } from "next/navigation"; |
useRouter
在 Next.js 中,useRouter 是一個非常常用的 React hook,它允許你訪問 Next.js 的路由系統,並讓你能夠程式化地導航、訪問路由參數、監聽路由變更等。這對於需要更靈活導航邏輯的情況很有用,例如條件導航、攜帶查詢參數的跳轉、或監控路由狀態變化。
- 基本用法
首先,你需要從 next/router 中引入 useRouter,然後在你的元件內使用:
1 | import { useRouter } from "next/router"; |
其他方法
1
2
3
4
5
6
7
8
9
10
11
12
13
14
15
16// push: 將使用者導航到新的 URL。
router.push("/about");
// replace: 與 push 相似,但它會用新頁面替換當前的歷史紀錄,使用者無法返回上一頁。
router.replace("/about");
// back(): 導航到瀏覽器的上一頁。
router.back();
// forward(): 導航到瀏覽器的上一頁。
router.forward();
// reload(): 重新加載當前頁面。
router.reload();
// prefetch(url): 預加載指定頁面的資料,當使用者點擊鏈接時,頁面能夠更快加載。它在連結元件中默認開啟,但可以手動使用。